
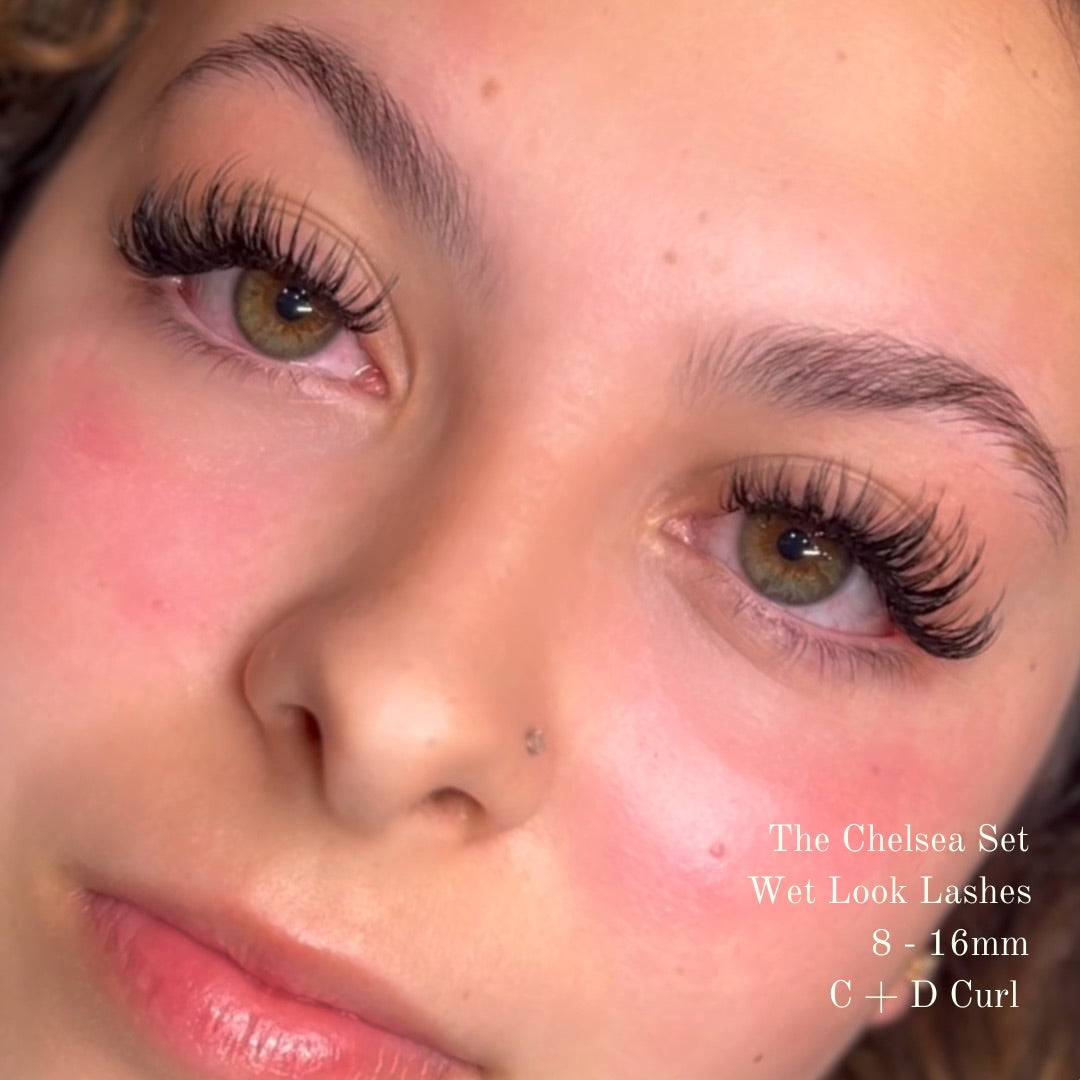
So you want to know how to create a wet lash look using handmade closed fans?
Look no further!
In this blog post, we will focus on the application process and lash mapping techniques to help you create this stunning wet lash look.
Step 1: Selecting the Right Lashes for a Wet Look: To create the wet lash effect, we will use handmade closed fans instead of classic lashes. Closed fans provide a dense and full appearance, mimicking the look of wet, clump-free lashes. Choose lash extensions that are super dark for a more authentic wet lash effect. Opt for 0.05 or 0.03 diameter lashes, as they are thinner and lighter, allowing for safe lash application.
Step 2: Creating Closed Fans: To make closed fans, start by grasping a few lashes from your lash strip, a bit like how you would pick up a volume fan. Instead of fanning them out leave them closed and keep the lashes together as much as possible. Use a small amount of adhesive to secure the base of the closed fan.
Step 3: Lash Mapping for Desired Shape: Lash mapping plays a crucial role in achieving the desired lash shape for the wet lash look. Before application, assess your client's eye shape and natural lash growth pattern. With a lash mapping pen or a fine eyeliner pencil, mark specific areas to guide you during the application process. Mapping helps to ensure symmetry and creates a tailored, flattering look for each individual.

Step 4: Application Technique: Start the application process by carefully dipping the base of your handmade closed fan into a small amount of adhesive. Place the closed fan on top of a natural lash, as close to the lash line as possible (2mm) without touching the skin. Gently press the fan onto the natural lash, ensuring it is firmly attached.
Step 5: Building Density and Length: To enhance the wet lash effect, focus on building density and length towards the outer corners of the eyes. Apply longer closed fans to the outer lashes, gradually decreasing in length towards the inner corner. This technique creates a winged and elongated appearance, contributing to the overall allure of the wet lash look.
Step 6: Repeat and Fill Gaps: Continue applying the handmade closed fans to each natural lash, following your lash mapping guide. Fill any noticeable gaps between the natural lashes, ensuring a seamless and cohesive result. Take your time to ensure each fan is correctly placed and secured.
Conclusion: Congratulations on mastering the art of applying handmade closed fans for the popular wet lash look! By using this technique and incorporating lash mapping, you can create a set for you to be proud of. Remember to opt for 0.05 or 0.03 diameter lashes to achieve the desired effect. With practice and attention to detail, you'll be able to create breathtaking wet lash looks that will leave you super happy

Davina x